
![Seikonaut Bracelet 20/16mm [TITANIUM] - - - - Lucius Atelier - Swiss Quality Seiko Watch Mod Parts](http://luciusatelier.com/cdn/shop/files/Seikonaut-Bracelet-2016mm-TITANIUM-Lucius-Atelier-Swiss-Quality-Seiko-Watch-Mod-Parts-7_1600x.jpg?v=1745004195)
![Seikonaut Bracelet 20/16mm [TITANIUM] - - - - Lucius Atelier - Swiss Quality Seiko Watch Mod Parts](http://luciusatelier.com/cdn/shop/files/Seikonaut-Bracelet-2016mm-TITANIUM-Lucius-Atelier-Swiss-Quality-Seiko-Watch-Mod-Parts-7_2000x.jpg?v=1745004195)
Changing the dial and hands is the mod that hooks most people. It is the most visible change you can make to a Seiko — a new face, a new character — and it needs no lathe, no exotic tooling, just a few watch tools and a good deal of patience. This is the swap that turns a stock Seiko into your Seiko.
Below is the whole job, photographed stage by stage: opening the caseback, lifting the movement, removing the old dial and hands, fitting the new ones, and closing it all back up. The mechanical steps are easy. The one that takes practice is setting the hands level and evenly spaced — so that is where we slow down.
Difficulty: 4 / 5 — setting the hands is the challenge
What You'll Need
None of this is exotic. Serviceable "China-made" tools will complete the job; Swiss-made versions cost far more and are nicer to use, but both get you there. Wear gloves or finger cots so you never touch the movement or parts directly.
- Caseback opener — a Jaxa-style wrench opens any Seiko caseback; a combined opener-and-holder is a luxury worth having.
- Case holder — grips the case so you're not prying against your fingers (SKX-type casebacks are tight).
- Hand remover — a Presto-type lever lifts hands cleanly without marking the dial.
- Hand-setting tool — a multi-runner setter presses hands on square and level; the hard step lives or dies here.
- Loupe — non-negotiable for judging hand height and spotting dust.
- Cleaning putty and tweezers — to hold hands and lift fingerprints; carbon-fibre tweezers scratch less than steel.
- Compressed air — clears dust off the dial, hands, and inside the case before closing.
- Dial protector — a Bergeon guard or even a food-grade poly film shields the dial (and hands) while you pull the old hands.
Open the Case and Free the Movement
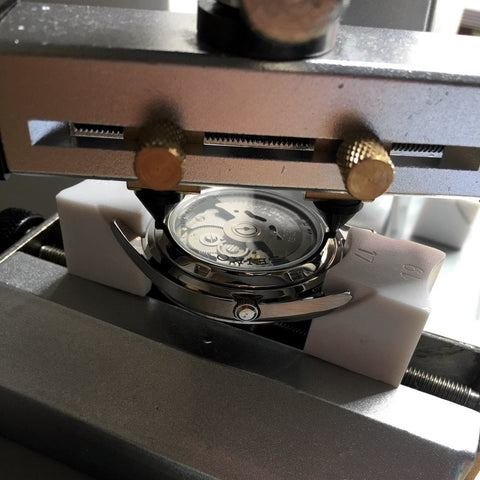
Step 1 — Open the caseback
Seat the opener's bits into the notches on the caseback and turn anti-clockwise to loosen (clockwise tightens on the way back). A holder reduces slippage and the odds of scoring the case.


Step 2 — Pull the crown and stem
With the movement exposed, release the crown before removing the movement. Press gently on the setting lever with a toothpick and the crown and stem slide out. That lever sits in much the same place across Seiko movements — 7S26, 7S36, NH35, NH36.


Step 3 — Lift the movement out
If the movement sits tight, ease it up with a toothpick or small flat-head, then tip it dial-up onto a cushion. On non-hacking 7S and older 4R movements, the cleanest way to stop the seconds hand is to let the mainspring wind down first.

Remove the Old Dial and Hands
Step 4 — Remove the hands
Line the hands up pointing the same way, lay a protective film over the dial and hands, and lift all three with a Presto-type remover. The film spreads the load and shields both the dial and the hands.

Step 5 — Lift off the dial
Slip a small flat-head into the gap between the dial and the plastic movement ring and twist gently; the dial lifts away. A toothpick works too. Take care not to bend the dial feet — they're delicate and you'll want them straight for the next dial.


Fit the New Dial
Orient the movement to its crown position, then find the two holes in the plastic ring around the movement — that's where the new dial's feet drop in.

Set the New Hands
This is the step that separates a clean mod from a frustrating one. Fit the hour hand first, then the minute, then the second, holding each with putty or tweezers and pressing it home with the setting tool. After the hour and minute are on, refit the stem and advance the time — the hands should land squarely on each marker.


The whole trick is height: the hour, minute, and second hands must sit level and evenly spaced apart, or they'll foul each other and stop the watch. It is tempting to press a hand fully home — don't. Press gently, just enough, and judge the gap with a loupe. Knowing how much force to use, and when to release, is the part that only comes with practice.

If the second hand won't move, or stops after a full turn, work through these in order:
- Dust in the gear train. A speck between the centre pinion and the minute wheel can stop or wear a movement. Work in a low-dust space, blow the parts off often, and check for debris.
- A bent centre-seconds pinion. Pressing a hand onto the side of the pinion dents it. Keep it straight; a loupe (and holding your breath as you press) helps.
- A damaged second-hand pin. The hand's hollow pin must be straight and correctly sized to the pinion — not dented.
- Uneven hand height. The most common culprit. Hands pressed to different heights collide; keep all three level and horizontal.
- A bent hand. A minute hand tipped slightly upward at the tip will clip the second hand and stall the movement. Straight hands only.


Clean Up, Close, and Watch It Done
Blow the dial, hands, and inside of the case clean with compressed air; lift any fingerprints with putty or a little ethanol, and only ever wipe with microfibre to avoid hairlines. Then set the movement dial-up, align the case to it, and press the case home.


Flip the case, confirm the movement is fully seated and the crown position lines up — if the stem slides in effortlessly, you're aligned — then check the caseback gasket is intact and screw the caseback down clockwise. That's the swap.
Prefer to watch it done first? Here's a full SNK walkthrough courtesy of Eric Y / Lume Shot .
Modifying a watch generally voids its warranty, and any external links above aren't maintained by Lucius Atelier. Work at your own risk.
Ready for a new face on your build?